
Whether you want to stream yourself playing video games, arts and crafts, or just chatting, compared to Youtube gaming, Twitch is currently the best place for a blind person to begin. Knowing what software to use is critical, but can also be intimidating to learn because of the wide spectrum of inaccessible products in the industry. Fortunately for you, I’ve been streaming content for a few years now and I want to pass on what I’ve learned. No matter if you have a gaming PC or just a console, this guide will provide solutions to make your stream more accessible. In this article you’ll learn how to use OBS with a screen reader, how to use Stream Elements or Firebot to control your stream, and tips to improve your streaming experience.
OBS vs StreamLabs
Within the streaming community, there are generally two programs streamers use to stream their content to Twitch and those are Open Broadcaster Software (OBS) and Streamlabs, both open source. Right away, I will mention that I specifically do not use Streamlabs because of how resource intensive it is on the RAM, but also because of the recent plagiarism scandal that has been revealed regarding their practices. That leaves us with OBS, a tried and true software that essentially jumpstarted the streaming craze in 2012. Compared to Streamlabs, OBS is much lighter on your computer and is generally more accessible with a screen reader. Not to mention, Streamlabs uses an accessibility overlay.
Learning OBS
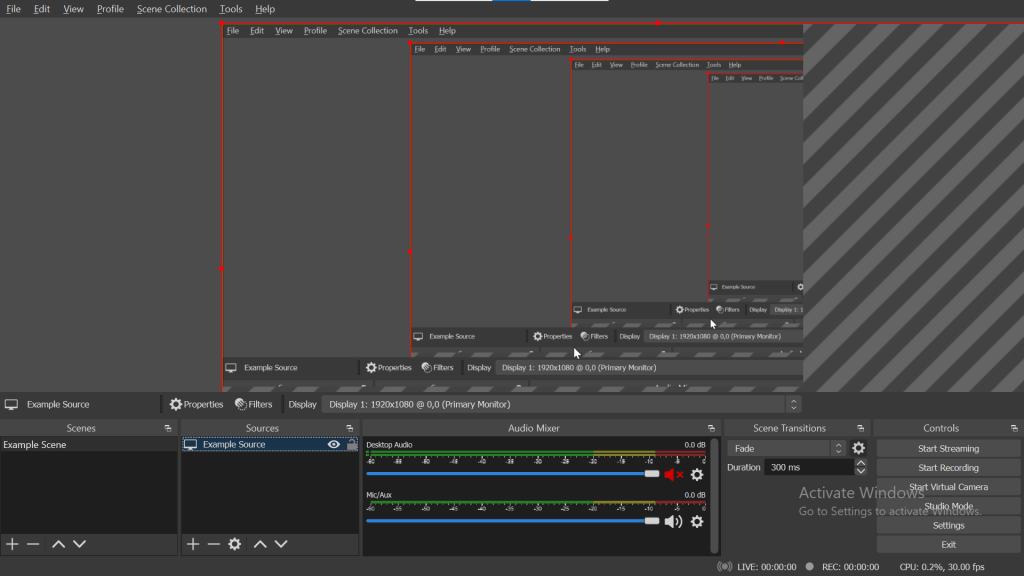
Go ahead and download, install, and run OBS, and then tab around to familiarize yourself with the program. Most buttons are clearly labeled and self-explanatory: record is to record, stream is to go live, etc. What makes OBS so powerful is through the use of scenes, sources, and your overlay. A scene in OBS is similar to a profile, and within the scene are sources, each a puzzle piece that is responsible for what your viewers hear and see, such as your camera, your game, etc. You can find scenes by tabbing until you hear an empty space or “scenes”, depending on the screen reader. One tab over will be the sources for each corresponding scene. Make sure to also have your Twitch stream key handy, which can be obtained by following these instructions.
Adding Scenes and Sources
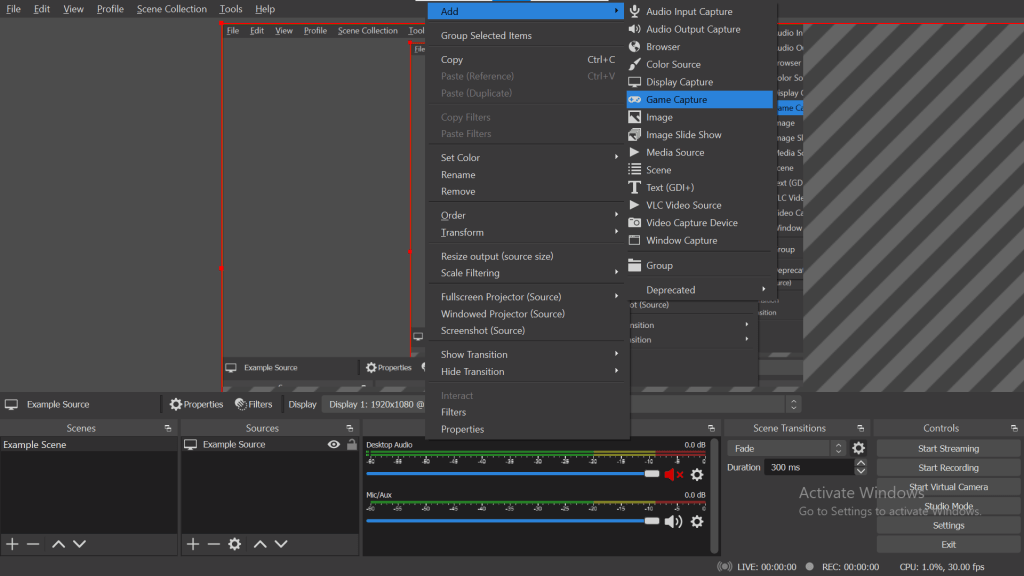
Simply put, to add a scene, just right click in the scene area. Adding sources uses the same method, but you also need to know what type of source you want to add. The ones you’ll most likely use are video capture device for your camera, game capture to capture a specific game running on your computer, and video capture device again if you are using a capture card. Sources such as display and window are self-explanatory and are used for more specific cases.
What are overlays and how do they work?
An overlay is a frame that surrounds your video and whatever else you have on screen. Overlays can also contain helpful features such as social media, latest follower, an alert box, interactive buttons, and so much more. Unfortunately, outside of having a basic camera setup, designing your overlay and where you want your devices to appear is not accessible, so you will need sighted assistance if you want a more detailed overlay. However, using the methods I am about to show you, you can have someone set up your overlay once, and then it shouldn’t need much maintenance from then on out.
Reading Twitch Chat
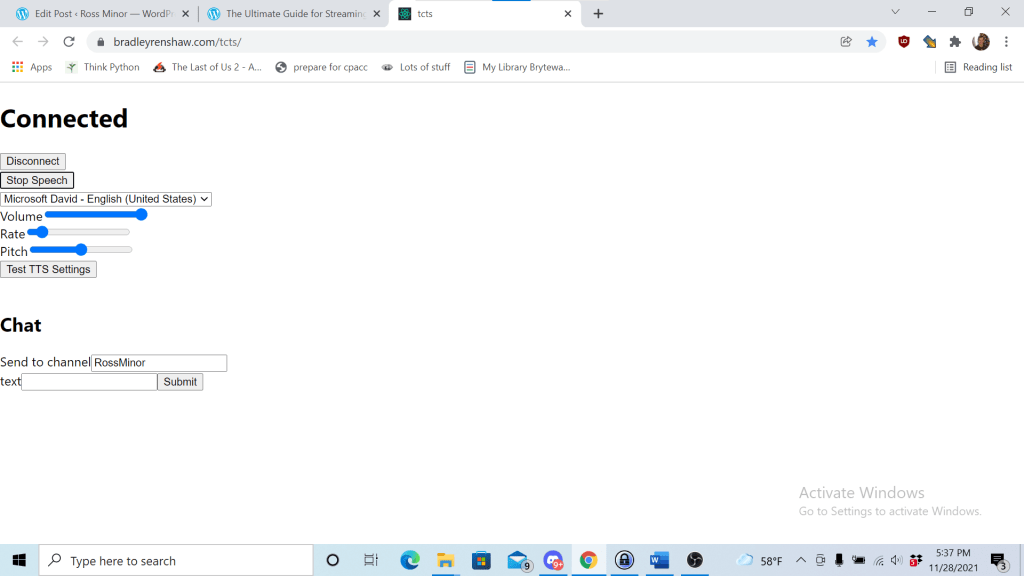
Reading chat text is an infamous issue among the blind streamer community, and I’m happy to report there are a couple solutions. First, a developer by the name of Bradly Renshaw created a web application that can connect to your Twitch and read incoming chat messages. It can also be customized to fit your TTS preferences. Sometimes it can be difficult to keep up with chat TTS and screen reader TTS, but it is the best option if you are streaming from a console, specifically an Xbox, while PlayStation has built in chat TTS. It is also worth noting that this program only works on Twitch.
Using Stream Elements with OBS
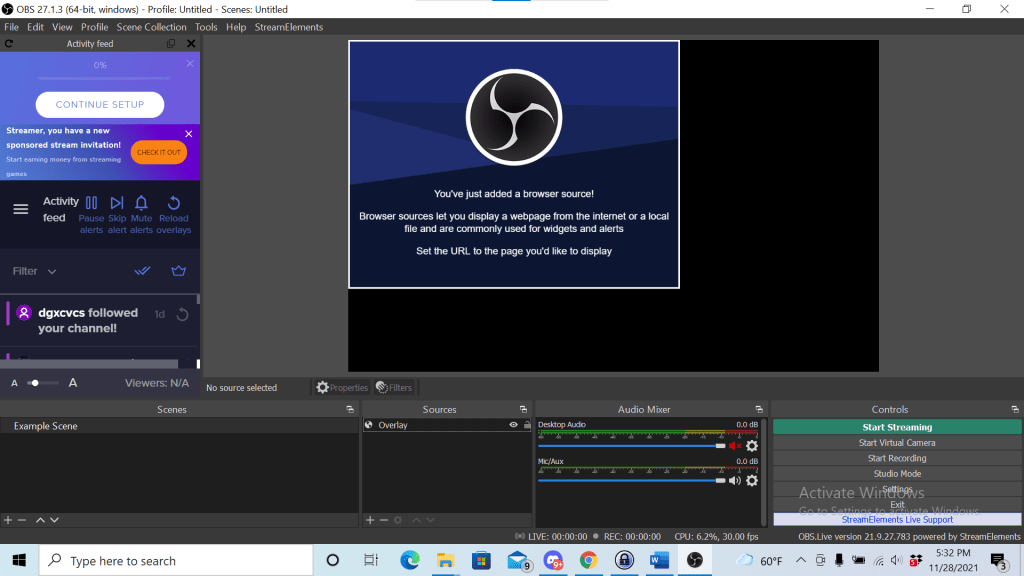
Stream Elements is a cloud-based service and is what I prefer to use in tandem with OBS Studio because Stream Elements offers many useful features such as moderation, chat commands, cloud overlays, and more, all hosted on their end, so you don’t have additional programs and settings to accidentally change. Once signed in on Stream Elements, you can create an overlay, then copy the link it gives you, and add it as a browser source in OBS. From there, someone can move each source into position in your overlay. I would also make sure to lock each overlay source by right clicking on the source and choosing lock, that way you prevent the risk of accidentally modifying it.
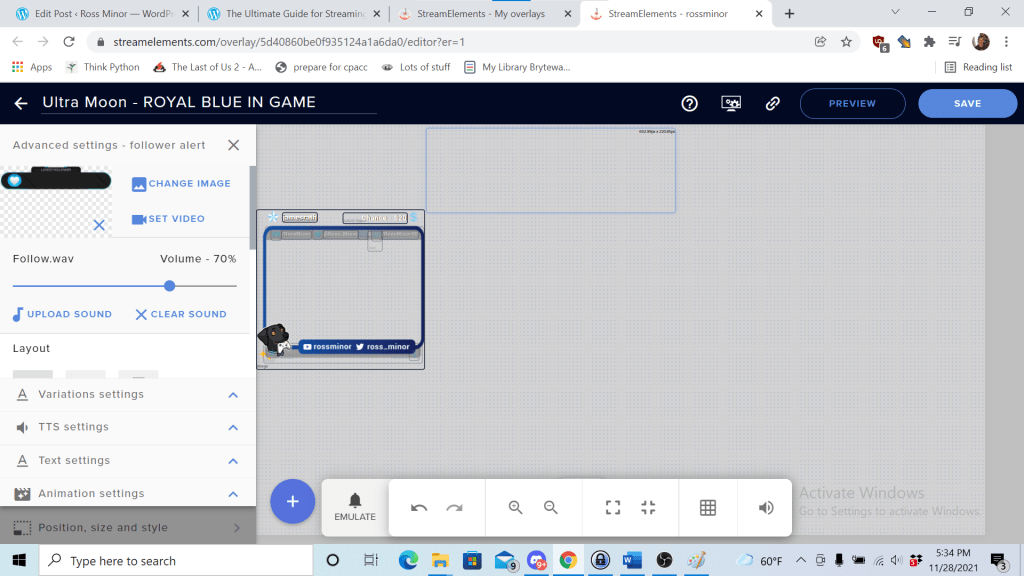
Sound Effects with Stream Elements
You probably want to know how to add sound effects to your stream, as they are great for engagement and give some personality to your stream. Once you have added an alert box to your Stream Elements overlay, you can navigate to the overlay editor and into the settings of the alert box. There you will find all of the different sound events you can have trigger on your stream, as well as settings for how they trigger and at what volume. Stream Elements has a lot of work to do in regards to their web accessibility and leaves much to be desired (contact me Stream Elements), but they are still better than Streamlabs, and I’ve found that editing sound effect settings can be a bit tedious to do.
Firebot
Firebot is an all in one Twitch bot that can be downloaded here and installed onto your computer. it also happens to be accessible, but in my opinion, the learning curve is a bit higher than Stream Elements because of how bear bones it is: it may have more functionality than Stream Elements, but everything from alerts to effects will need to be specified, rather than having a default on Stream Elements. Combine that with the fact stream Elements still isn’t as accessible as Firebot, it boils down to whatever you prefer. Big thank you to @Jennissary and @dbzfn94 for making me aware of Firebot.
Sound Effects with Firebot
As you will soon learn, managing sounds with Firebot is much more accessible and capable than on Stream Elements. Here are the steps for adding a sound effect when someone follows you:
- Navigate to and select Events.
- Find the box containing type of events and use your arrow keys to scroll through them.
- Select the option that says, “Follow, when someone follows your Twitch” and press enter. From there you will be presented with ways to customize your event.
- Select “add new effect” and look for play sound. Then navigate to the bottom of the page to confirm.
- The rest is self-explanatory and is up to how creative you want to be. You can simply have it play a file, or you can randomize it from a folder containing sounds, and more.
Reading chat with Firebot
As mentioned earlier, Firebot can take time to set up, but it is absolutely worth the time learning the program and all the various things you can do with it. Here are the steps to set up chat TTS:
- Navigate to events and press “new event”
- Select the first box and arrow down to “chat message”. This will be the trigger for your event.
- Navigate to and select “add new event”.
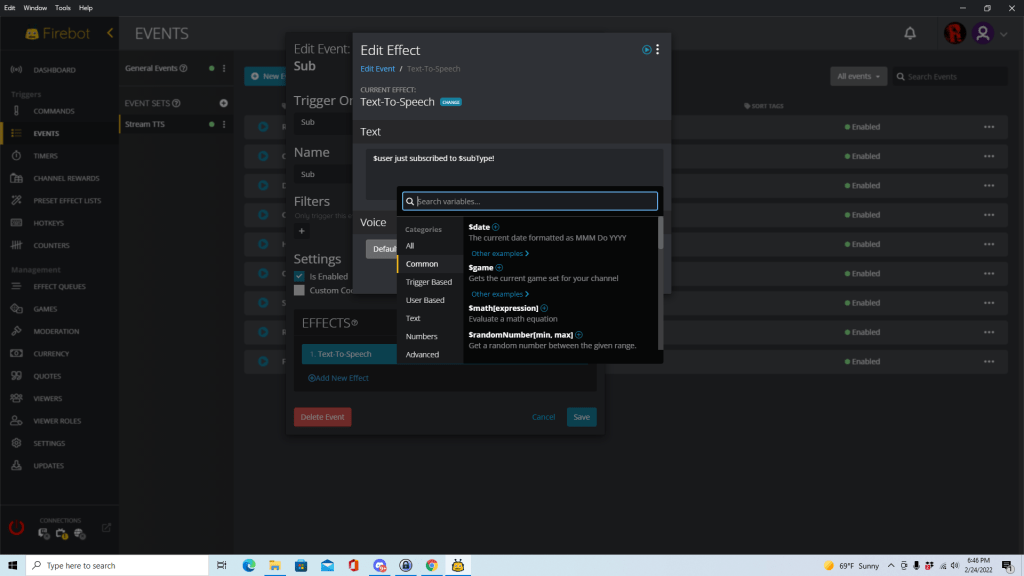
- Select all events, then tab all the way to “text to speech”. Note, there is the option of using other service, such as Amazon Poly, which take additional steps to set up. For the sake of this guide, we will be using the built in Firebot TTS.
- Once selected, navigate to the bottom and press “select”
- Navigate to the textbox labeled “enter text” and type in the following: “$user $chatMessage”
- Finally, press add at the bottom, then save and you are all set.
This will set up an incredibly basic chat TTS for your stream, but it will not read out any other events such as subscriptions, raids, and more, only chat messages. To have Firebot read more in your stream, you will need to set up a specific TTS event for each event you want to read. As you can imagine, this is incredibly tedious, but yours truly has gone through the trouble of creating a Firebot set with all necessary TTS events that you can import into your own Firebot. You can download the chat TTS set here and subscriptions, raids, hosts, and more will all be read out to you. This set will be a great utility, but don’t be afraid to inspect each event and understand how Firebot variables work, as they can be quite powerful and provide extensive customization beyond this basic set.
Chat Moderation
While Stream Elements does have the ability to moderate chat, similar to the alert box settings, moderation is fairly clunky to navigate. Thankfully Nightbot, a popular chat mod for Twitch, is extremely accessible and easy to set up. I prefer to use it alongside the Stream Elements bot; Nightbot for moderation, and Stream Elements to announce followers, subscribers, and other events. Firebot is also another great option.
How to Stream Directly to Twitch from PlayStation or Xbox
Thankfully, with all of the tools I’ve presented, streaming via console is more available than ever, giving more people than ever the opportunity to stream themselves playing video games. Here’s how it is done:
PlayStation
Compared to Xbox, streaming directly from PlayStation is a walk in the park. Not only can you click a button and go live, but both the PS4 and PS5 have built in chat TTS. Keep in mind that in order to capture yourself, you will need to purchase a PlayStation camera, as they are the only ones compatible on PlayStation consoles. PlayStation consoles do offer a wider selection of compatible mics, such as the tried and true Blue Yeti mics. Here’s how you enable TTS and go live:
- Open the game you would like to stream.
- Once in the game, press the option button (the top left button above the touch pad) on your controller.
- Navigate to browse, select Twitch, and then go to twitch.tv/activate and enter the code on your screen. Note: You will need to use Seeing AI or a similar app to read the code on your screen. If you do not have a screen or sighted assistance, take a screenshot of the code, join the Accessible Gaming Discord, and we will make sure you get the help you need.
Here’s how to enable chat tts:
- Navigate to “Settings” on your console.
- Scroll all the way down and select “Capture and Broadcasts” and then select “Broadcasts”.
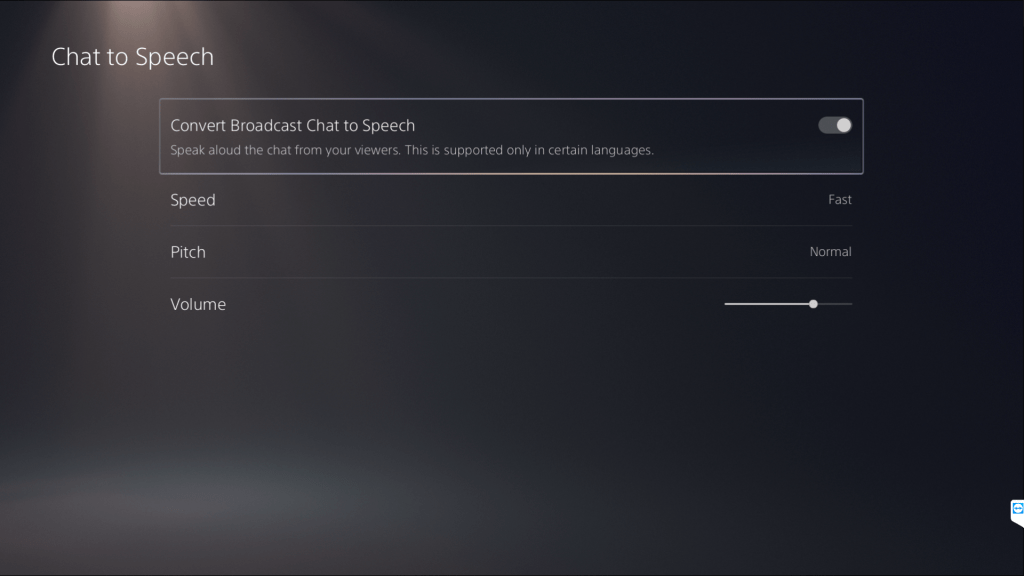
- Scroll all the way down and select “Chat to Speech”.
- Here you will be able to enable chat to speech, as well as adjust speed, pitch, and volume.
- Now you’re all good to go!
Xbox
Streaming directly to Twitch from Xbox has only recently been possible for blind gamers, since Microsoft announced Twitch integration for the Xbox. This allows blind gamers to circumnavigate the Twitch app on Xbox, which is completely inaccessible with narrator. Keep in mind that Xbox consoles are extremely limited in compatible mics, but do offer a much wider selection of cameras to use. To stream directly to Twitch from your Xbox, perform the following:
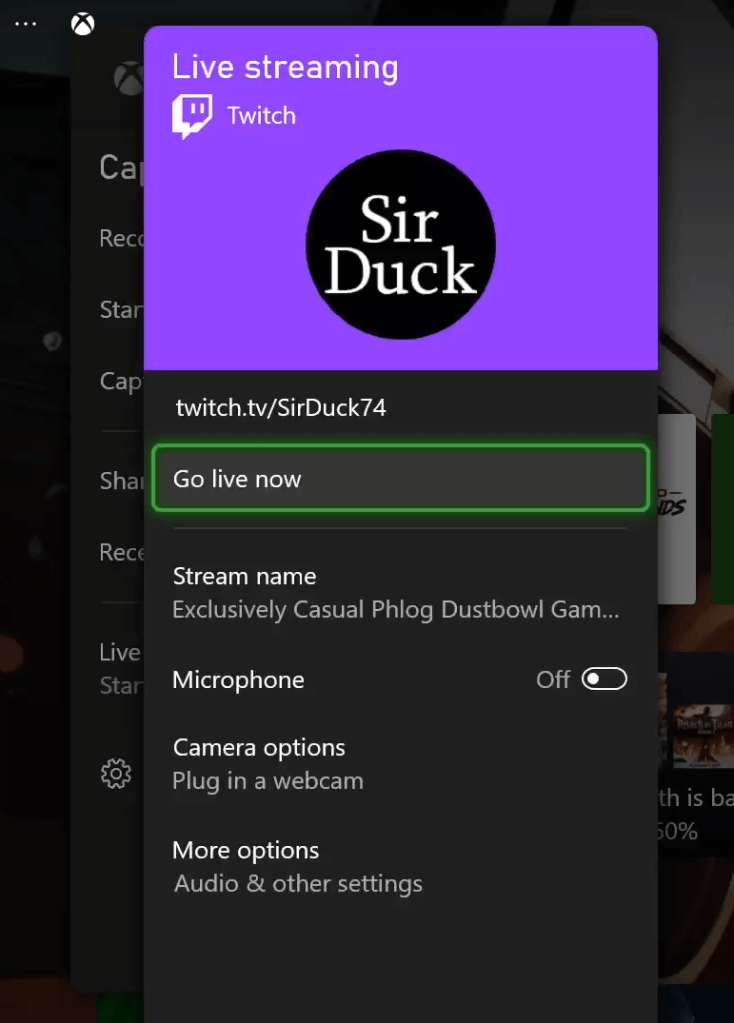
- Navigate to the “Capture and Share” tab with your bumpers.
- Scroll down and select “live streaming”.
- Go to twitch.tv/activate and enter the code on your screen. Note: You will need to use Seeing AI or a similar app to read the code on your screen. If you do not have a screen or sighted assistance, take a screenshot of the code, join the Accessible Gaming Discord, and we will make sure you get the help you need.
- Once you enter the code, you will be redirected and your Twitch account will be linked.
Unlike PlayStation systems, Xbox does not have a way to read incoming chat through TTS. I recommend using the aforementioned TCTS website to read chat. It’s certainly not ideal, but that is the best solution with the tools Microsoft has given us.
Closed Captions on Twitch
As a blind streamer, you should want your stream to be as accessible as possible by adding closed captions to your stream for deaf and hard of hearing people. The easiest way to do this is by downloading this open source closed captioning plugin for OBS. Follow their instructions for installing it here. Once installed, there’s nothing else you need to do and you will now have closed captions on your stream!
Additional Tips
If you do not want your screen reader to be heard through the stream, you will have to redirect your screen reader output to a separate sound card. I personally like my screen reader going through because people find it interesting and it’s a good conversation starter.
Conclusion
There you have it! That is just about everything you need to begin streaming on Twitch! Accessibility aside, streaming can be rewarding and tedious hobby, but everyone deserves the opportunity to give it a go, and by streaming, you’re helping spread awareness as well! Go out there and show the world what you’ve got!

Leave a comment